Showing posts with label Summer تابستان. Show all posts
Tuesday, June 28, 2016
Fava Bean Kuku کوکو باقلا
It feels as if it was yesterday that in my last blog post I talked about our family picnics when we were kids. Today along with my fellow Persian food bloggers we are sharing our favorite recipes for summer picnics. And that is so appropriate, given how Iranians in general love to picnic. Every Friday, which is the weekend in Iran you can see people in national parks having family picnics and get togethers. We even have a national holiday dedicated to picnicking on the thirteenth day of the New Year.
While the staple dishes on an Iranian table usually consist of rice and hot stews, for picnic most would normally pack something lighter and easier to transport, like this fava bean kuku.
Coincidentally few weeks ago, determined to try out a new recipe from Yotam Ottolenghi and Sami Tamimi's cookbook Jerusalem I came across this kuku recipe, which the authors also credit to Iranian Jewish community in the book's namesake city. So I figured I'd kill two birds with a stone and try out this recipe for our collaborative post.
Kuku has many variations of herbs, fruits and vegetables mixed with egg and baked in a frying pan. It's more like a frittata or Spanish tortilla. The most popular version is the mixed herb kuku which is one of the dishes on the Persian New Year's table. There are also some made with different kinds of meat, like this chicken kuku I made a while ago.
Happy picnicking :)
Adapted with minor changes from Yotam Ottolenghi and Sami Tamimi's Jerusalem
Ingredients
1 lb/ 500 g fava beans, fresh or frozen
5 tbsp / 75 ml boiling water
2 tbsp superfine sugar
5 tbsp / 45 g dried barberries
3 tbsp heavy cream
1/4 tsp saffron threads
2 tbsp cold water
5 tbsp olive oil
1 medium onion, finely chopped
4 cloves garlic, crushed
7 large free-range eggs
1 tbsp all-purpose flour
1/2 tsp baking powder
1 cup / 30 g dill, chopped
1 cup/ 15 g mint, chopped
Salt and freshly ground black pepper
Directions
Preheat the oven to 350F / 180C. Put the fava beans in a pan with plenty of boiling water. Simmer for 1 minute, drain, refresh under cold water, and set aside.
Pour the 5 tbsp / 75 ml boiling water into a medium bowl, add the sugar, and stir to dissolve. Once this syrup is tepid, add the barberries and leave them for about 10 minutes, then drain.
Bring the cream, saffron, and cold water to a boil in a small saucepan. Immediately remove from the heat and set aside for 30 minutes to infuse.
Heat 3 tablespoons of the olive oil over medium heat in a 10-inch / 25cm nonstick, ovenproof frying pan for which you have a lid. Add the onion and cook for about 4 minutes, stirring occacionally, then add the garlic and cook and stir for a further 2 minutes. Stir in the fava beans and set aside.
Beat the eggs well in a large mixture bowl until frothy. Add the flour, baking powder, saffron cream, herbs, 1 1/2 teaspoon salt, and 1/2 teaspoon pepper and whisk well. Finally, stir in the barberries and the fava beans and onion mix.
Wipe the frying pan clean, add the remaining olive oil, and place in the oven for 10 minutes to heat well. Pour the egg mix into the hot pan, cover with the lid, and bake for 15 minutes. Remove the lid and bake for another 20 to 25 minutes, until the eggs are just set. Remove from the oven and let rest for 5 minutes, before inverting onto a serving platter. Serve warm or at room temperature.
Thursday, December 18, 2014
Cooked Fava Beans باقالی پخته
Yalda, the longest night of the year has been celebrated in Persia and modern day Iran for centuries. It signifies the victory of good (light) over evil (darkness).
To celebrate, Iranians all over the world will get together with friends and family after dark on the last day of autumn to read poetry, snack on pomegranate seeds, watermelon, nuts and dried fruits.
Traditionally, some people would lit candles and stay up until sunrise to witness the victory of light over darkness, have a hearty breakfast and leave the party. However in the modern days since Yalda doesn't always fall on a weekend and most people are busy with the day to day activity the celebration usually lasts until later in the night.
As a child, I remember Yalda being one of my favorite times of the year. We would get together with cousins, aunts and uncles. We would laugh at jokes, be mesmerized by old tales told by our elders, and read our fortunes from Hafez (14th century Iranian poet who wrote about joys of love and wine).
In our family there has been an additional food next to the cut watermelon, nuts, and bowls of pomegranate seeds that my dad had been seeding that day. We love to snack on cooked fava beans.
Cooked fava beans are a favorite winter snack in Iran, whether they are cooked at home or sold by street vendors in corners of the streets, drizzled with juice of seville orange or vinegar and sprinkled with some angelica powder they are both comforting and fun to eat.
To cook them, bring to a boil 1 pound fresh fava beans in a pot with 8 cups of water and 4 tablespoons salt, then reduce the heat to simmer and cook for about 15 minutes. Alternatively, if you are using frozen fava beans you can cook them for about 5 minutes. And If you are using dried ones, you need to cook them for about 3 hours.
After the beans are fully cooked, drain them and drizzle them with the juice of seville oranges or vinegar and sprinkle them with angelica powder, salt and pepper to taste.
Noosh-e-jaan and have a happy Yalda!
To celebrate, Iranians all over the world will get together with friends and family after dark on the last day of autumn to read poetry, snack on pomegranate seeds, watermelon, nuts and dried fruits.
Traditionally, some people would lit candles and stay up until sunrise to witness the victory of light over darkness, have a hearty breakfast and leave the party. However in the modern days since Yalda doesn't always fall on a weekend and most people are busy with the day to day activity the celebration usually lasts until later in the night.
As a child, I remember Yalda being one of my favorite times of the year. We would get together with cousins, aunts and uncles. We would laugh at jokes, be mesmerized by old tales told by our elders, and read our fortunes from Hafez (14th century Iranian poet who wrote about joys of love and wine).
In our family there has been an additional food next to the cut watermelon, nuts, and bowls of pomegranate seeds that my dad had been seeding that day. We love to snack on cooked fava beans.
Cooked fava beans are a favorite winter snack in Iran, whether they are cooked at home or sold by street vendors in corners of the streets, drizzled with juice of seville orange or vinegar and sprinkled with some angelica powder they are both comforting and fun to eat.
To cook them, bring to a boil 1 pound fresh fava beans in a pot with 8 cups of water and 4 tablespoons salt, then reduce the heat to simmer and cook for about 15 minutes. Alternatively, if you are using frozen fava beans you can cook them for about 5 minutes. And If you are using dried ones, you need to cook them for about 3 hours.
After the beans are fully cooked, drain them and drizzle them with the juice of seville oranges or vinegar and sprinkle them with angelica powder, salt and pepper to taste.
Noosh-e-jaan and have a happy Yalda!
Thursday, July 31, 2014
Summer Squash and Tomato Tart تارت کدو و گوجه فرنگی
It takes this California grizzly bear some summer squashes and tomatoes to wake up from her winter hibernation! Between Nowruz, having guests over from Iran and the Great Britain, and traveling to Turkey, we sure did a lot of great cooking, baking and ice cream making, but to find time to sit and write about them all has been the challenging part. But the sight of the first tomatoes in my parents' garden, which thanks to the early summer heat in the Bay Area started to ripen two months ahead of their normal schedule got me so excited to talk food that I had to come here and check on you lovelies.
The recipe for this tart is from Food & Wine's July 2007 issue. I've gotten into the habit of pulling the old issues of my cooking magazines each month to make sure I actually use them. As soon as I saw the ingredients list I knew I wanted to make it. Summer squash and tomatoes over pesto and goat cheese, who wouldn't want to eat that!? Sous chef has been getting into the habit of making pesto and storing it in the fridge, so that made it even easier to make the tart. And I'm sure it'll turn out as great if you make it with store bought pesto. And in case you're not a big goat cheese fan, the pesto flavor will overpower it, but feel free to replace it ricotta or farmers' cheese if you absolutely can't stand a hint of it.
Adapted from Food & Wine
Ingredients
2 tablespoons extra-virgin olive oil
1 pound small yellow squash, sliced 1/4 inch thick
1 large onion, halved and thinly sliced
Salt and freshly ground white pepper
2 tablespoons prepared pesto
5 ounces fresh goat cheese, softened
All-purpose flour, for dusting
14 ounces puff pastry, chilled
1 plum tomato, very thinly sliced
1 large egg beaten with 2 tablespoons water
10 small pitted green olives, coarsely chopped
Directions
Preheat the oven to 425 degrees fahrenheit and line a baking sheet with parchment paper. In a large skillet, heat the olive oil. Add the squash and onion and season with salt and white pepper. Cover and cook over moderately high heat, stirring occasionally, until the squash and onion are lightly browned, about 5 minutes. Remove the skillet from the heat and let stand, covered, for 5 minutes. Transfer the vegetables to a strainer and press lightly.
Meanwhile, in a small bowl, blend the pesto with the goat cheese. On a lightly floured surface, roll out the puff pastry to a 13-inch square; trim the square to 12 inches. Prick the pastry all over with a fork and invert it onto the parchment-lined baking sheet.
Spread the goat cheese all over the pastry, leaving a 1-inch border all around. Top with the squash mixture. Arrange the tomato slices on the tart and sprinkle with salt and white pepper. Fold up the sides, pressing the corners together. Trim any excess pastry at the corners. Brush the pastry with the egg wash and bake in the lower third of the oven for about 45 minutes, until the edges are golden and the bottom is completely cooked through. Sprinkle with the olives, cut into squares and serve right away.
The recipe for this tart is from Food & Wine's July 2007 issue. I've gotten into the habit of pulling the old issues of my cooking magazines each month to make sure I actually use them. As soon as I saw the ingredients list I knew I wanted to make it. Summer squash and tomatoes over pesto and goat cheese, who wouldn't want to eat that!? Sous chef has been getting into the habit of making pesto and storing it in the fridge, so that made it even easier to make the tart. And I'm sure it'll turn out as great if you make it with store bought pesto. And in case you're not a big goat cheese fan, the pesto flavor will overpower it, but feel free to replace it ricotta or farmers' cheese if you absolutely can't stand a hint of it.
Adapted from Food & Wine
Ingredients
2 tablespoons extra-virgin olive oil
1 pound small yellow squash, sliced 1/4 inch thick
1 large onion, halved and thinly sliced
Salt and freshly ground white pepper
2 tablespoons prepared pesto
5 ounces fresh goat cheese, softened
All-purpose flour, for dusting
14 ounces puff pastry, chilled
1 plum tomato, very thinly sliced
1 large egg beaten with 2 tablespoons water
10 small pitted green olives, coarsely chopped
Directions
Preheat the oven to 425 degrees fahrenheit and line a baking sheet with parchment paper. In a large skillet, heat the olive oil. Add the squash and onion and season with salt and white pepper. Cover and cook over moderately high heat, stirring occasionally, until the squash and onion are lightly browned, about 5 minutes. Remove the skillet from the heat and let stand, covered, for 5 minutes. Transfer the vegetables to a strainer and press lightly.
Meanwhile, in a small bowl, blend the pesto with the goat cheese. On a lightly floured surface, roll out the puff pastry to a 13-inch square; trim the square to 12 inches. Prick the pastry all over with a fork and invert it onto the parchment-lined baking sheet.
Spread the goat cheese all over the pastry, leaving a 1-inch border all around. Top with the squash mixture. Arrange the tomato slices on the tart and sprinkle with salt and white pepper. Fold up the sides, pressing the corners together. Trim any excess pastry at the corners. Brush the pastry with the egg wash and bake in the lower third of the oven for about 45 minutes, until the edges are golden and the bottom is completely cooked through. Sprinkle with the olives, cut into squares and serve right away.
مواد لازم
روغن زیتون ٢ قاشق سوپ خوری
کدو زرد کوچک, ٥٠٠ گرم, به ضخامت ١ سانتیمتر ورقه شده
پیاز بزرگ, ١ عدد, خلال شده
نمک و فلفل سفید
سس پستو, ٢ قاشق سوپخوری, برای طرز تهیه اینجا کلیک کنید
پنیر بز, ١٤٠ گرم
خمیر هزار لایه, ٤٠٠ گرم
گوجه فرنگی, یک عدد, خیلی نازک ورقه شده
یک تخم مرغ زده شده با ٢ قاشق آب
زیتون سبز خرد شده, ١٠ عدد
آرد برای باز کردن خمیر
طرز تهیه
فر را روی درجه ٤٥٠ فارنهایت یا ٢٣٠ سانتیگراد روشن کنید تا گرم شود, روی سینی فر کاغذ روغنی بیاندازید. در یک تابه بزرگ, روغن زیتون را داغ کنید. کدو و پیاز را به همراه نمک و فلفل اضافه کنید. در تابه را بگذارید و روی حرارت ملایم-زیاد بپزید, هر از چند گاهی کدو ها را هم بزنید, تا پیاز و کدو کمی قهوه ای شوند, حدود ٥ دقیقه. تابه را از روی حرارت بر دارید, و بگذارید برای ٥ دقیقه دیگر توی تابه بماند. کدو و پیاز را آبکش کنید و با پشت قاشق کمی فشار دهید تا آب آنها گرفته شود.
در یک کاسه کوچک, سس پستو را با پنیر بز مخلوط کنید. خمیر هزار لایه را روی سطح تمیزی که آرد پاشیدید به مربع با ضلع ٣٠ سانتیمتر باز کنید. با چنگال روی خمیر را سوراخ سوراخ کنید, و خمیر را روی کاغذ روغنی منتقل کنید.
مخلوط پستو و پنیر بز را روی خمیر پهن کنید, حدود ٢ سانتیمتر اطراف خمیر را خالی بگذارید. روی مخلوط پستو را با کدو و پیاز بپوشانید بعد ورقه های گوجه فرنگی را روی تارت بچینید و کمی نمک و فلفل بپاشد. کناره های تارت را روی تارت تا کنید و با تخم مرغ زده شده آغشته کنید. روی پنجره بین وسط و پایین فر به مدت ٤٥ دقیقه بپزید تا گوشه های تارت طلایی شود تارت کاملا پخته شود. تارت را از فر خارج کنید و زیتون خرد شده را روی آن بپاشید.
Sunday, September 15, 2013
Rice with Green Beans (Lubia Polow) لوبیا پلو
One of the main challenges in Persian cooking, is turning out the perfect rice. The rice needs to be cooked through, yet have separated grains.
I was about 13 when I asked my mom to teach me how to cook, and she thought it best to start with a simple kateh with saffron chicken. Then she moved on to teaching me how to make chelow (the Iranian style of cooking rice, which involves soaking, parboiling, draining, and then steaming the rice). This is the more challenging style in Persian cooking. And finally we moved to polow. Which is cooked the same way as chelow, with the exception that it is usually mixed with meat, vegetables and fruits. For recipes on some polows you can check here and here.
Now, I don't want to scare you off, but the most difficult rice dish to make, for me, was Lubia polow. The challenge is that the sauce you make to mix in with your rice will soak into your rice and might make your rice mushy. And in Persian cooking you don't want your rice to be mushy.
The trick is to know when to drain your rice while it's parboiling, and also to let the liquid in your sauce to evaporate enough so it's not so watery.
After many trial and errors, I give you my Lubia polow;
P.S. Just omit the meat and you'll have a vegan/vegetarian friendly meal :)
Ingredients:
2 1/2 cups basmati rice
3/4 cup butter, or vegetable oil divided
1 lb. green beans, cleaned and cut into 1/2 inch pieces
1/2 yellow onion, thinly sliced
1 lb. lamb meat chopped into 1/2 inch pieces
1/2 teaspoon turmeric
1 teaspoon cinnamon
1/2 teaspoon cardamom
1/4 teaspoon cumin
1 teaspoon dried lime powder
1 1/2 teaspoon salt
3 tablespoons tomato paste
1 lb diced tomatoes (drain the tomatoes if using canned)
3 medium yukon gold potatoes, peeled and sliced into 1/4 inch slices (for tahdig, the crust), optional
1 recipe liquid saffron
Directions:
Place the rice in a large bowl and cover with water. Agitate gently with your hand, and then pour off the water. Repeat this 3 to 4 times until the rice is completely clean.
Soak the rice with 5 cups of water and 3 teaspoons salt for 2 to 4 hours.
In a large pan over medium heat, heat 2 tablespoons of oil and sauté the green beans for about 10 minutes, until slightly golden. Transfer to a plate.
In the same pan, heat 2 tablespoon of oil over medium heat and brown onions. Add meat and brown. Add spices, salt, tomato paste, diced tomatoes, and the sautéed green beans. Reduce heat to medium low, cover and simmer for about 40 minutes.
In a large pot, bring 10 cups of water to a boil on high heat. Drain rice and gently pour into the boiling water. Bring water back to boil and boil for 5 to 7 minutes. Test the rice to see if it's done. Rice grains should be just shy of fully cooked, soft on the outside and firm on the inside. Drain rice and rinse with cool water.
Clean out the pot and return to the stove, add half of the remaining oil to the pot over medium to high heat. Arrange the potato sliced at the bottom of the pot and sprinkle with salt. When one side has slightly browned turn and remove from heat. With a spatula place 1 spatula of rice in the pot, layer it with meat and green bean sauce, repeat until all the rice and the sauce have been transferred to the pot, building a pyramid while making the layers. Make 2 to 3 holes in the rice to let the steam out. Cook for ten minutes over medium heat. Pour the remaining oil and saffron water over rice, place a dish towel or 3 layers of paper towel over pot and firmly cover the pot with its lid and reduce the heat to medium-low.
Cook for another 45 minutes. Using spatula place rice on a serving platter without touching the crust. Mound the rice in shape of a pyramid. Then remove the potato crust and place it on the side or another dish.
Serve with sabzi khordan. Noosh-e-jaan.
خداییش درست کردن غذای ایرانی کار ساده ای نیست. غذای ایرانی کلی مقدمه چینی داره، سبزی پاک کردن و شستن، پیاز داغ درست کردن، و غیره. از اون طرف هم یک وقتی باید بزاریم که غذا جا بیافته.
حالا از همه سخت تر هم برای کسی که میخواد تازه آشپزی کردن یاد بگیره درست کردن برنج هست به خصوص به طرز چلویی و پلویی.
تابستونی که میخواستم برام اول دبیرستان شروع کردم به آشپزی یاد گرفتن و مثل اکثر دخترهای ایرانی کدبانو آموزش آشپزی رو با درست کردن برنج به من یاد داد. که بعد از خوراندن اهل خانه به انواع برنج شل و دون و شور تا آخر تابستون کم کم درست کردن برنج ساده به روش چلو دستم اومد.
حالا بعدش رفتیم سراغ پلو های مختلف، که زیاد سخت نبودن الا این لوبیا پلو، که تصمیم نداشت با ما همکاری کنه و هر کار میکردم شل از آب در میومد و از اونجایی که زیاد هم از لوبیا پلو خوشم نمیومد، این شکست ها من رو دلچرکین تر هم کرد و کلا درست کردن لوبیا پلو رو گذاشتم کنار.
تا اینکه بلاخره تا چند سال پیش شروع کردم به مبارزه و بلاخره لمش دستم اومد که همش به این رابط داره که مایه رو کم آب کنیم و برنج رو یک کم زود تر آبکش.
حالا این هم نتیجه پیروزی بنده؛
مواد لازم
برنج ١/٢ ٢ پیمانه
روغن مایع یا کره ٣/٤ پیمانه، یا ١٥٠ گرم
لوبیا سبز، ٥٠٠ گرم، پاک شده، شسته و به تکه های ١ سانتیمتری خرد شده
پیاز زرد، ١/٢ نازک خرد شده
گوشت گاو یا گوسفند خورشتی ٥٠٠ گرم، به مکعب های ١ سانتیمتری خرد شده
زردچوبه، ١/٢ قاشق مربا خوری
دارچین، ١ قاشق مربا خوری
هل، ١/٢ قشق مربا خوری
زیره، ١/٤ قاشق مربا خوری
گرد لیمو عمانی، ١ قاشق مربا خوری
نمک ١/٢ ١ قاشق مربا خوری
رب گوجه فرنگی، ٣ قاشق غذاخوری
گوجه فرنگی خرد شده، ٥٠٠ گرم
سیب زمینی زرد متوسط، ٣ عدد (برای ته دیگ). پوست گرفته شده و به ورقه های نیم سانتیمتری بریده شده
٣ قاشق زعفران آب شده
طرز تهیه
برنج را ٣-٤ بار با آب بشوید، بعد با ٥ پیمانه آب و ٣ قاشق مربا خوری نمک بگذارید برای ٢ تا ٤ ساعت خیس بخورد.
در یک تابه بزرگ، دو قاشق از روغن را روی حرارت متوسط داغ کنید و لوبیا را برای حدود ١٠ دقیقه تفت دهید تا کامی طلایی شوند.و به یک بشقاب منتقل کنید.
در همان تابه دو قاشق دیگر روغن را روی حرارت متوسط گرم کنید و پیاز را سرخ کنید. گوشت را اضافه کنید و تفت دهید تا قهوه ای شود. ادویه ها را با نمک و رب گوجه و گوجه فرنگی خرد شده و لوبیا سبز به تابه اضافه کنید. همه مواد را مخلوط کنید، در تابه را بگذارد، و حرارت را کم کنید و بگذارد تا مایع کم کم جوش بخورد.
در یک قابلمه بزرگ ١٠ پیمانه آب را روی حرارت بالا جوش بیاورید. آب برنج را خالی کنید و برنج را به آب جوش اضافه کنید. بگذارد برنج برای ٥ تا ٧ دقیقه جوش بخورد تا قد بکشد، برنج را امتحان کنید و هر وقت فکر میکنید که با یک جوش دیگر برنج کاملا پخته میشود برنج را آبکش کنید. و روی آن یکی دو لیوان آب سرد بریزید. قابلمه را تمیز کنید و به اجاق بر گردانید . نصف باقی روغن را در قابلمه داغ کنید، حرارت را روی متوسط بگذارد و ورقه های سیب زمینی را ته قابلمه بچینید و روی آنها نمک بپاشد. هر وقت یک روی سیب زمینی سرخ شد سیب زمینی ها را برگردانید و از روی حرارت بر دارید. یک کفگیر از برنج را روی سیبزمینی ها بریزید و یک لایه از مایه روی آن بریزید. این کار را ادامه دهید تا همه برنج و مایه به قابلمه منتقل شوند.
بگذارد برنج روی حرارت متوسط برای ١٠ دقیقه دم بکشد، سپس شعله را کم کنید و باقی روغن و زعفران آب شده را روی برنج بریزید. دم کنی را روی در قابلمه قرار دهید و بگذارید برنج برای ٤٥ دقیقه دیگر هم دم بکشد.
برنج را به دیس مناسب منتقل کنید و ته دیگ را هم در بیاورید و به ظرف دیگری یا کنار برنج منتقل کنید.
با سبزی خوردن لوبیا پلو را نوش جان کنید.
Monday, August 19, 2013
Blackberry Cake کیک توت سیاه
The original recipe for this cake goes back to my teenage years, when I had just started cooking and baking. The recipe was handed to us by Giti joon, a family friend who brought the recipe with her from Sweden to Iran. We loved this cake and during summer, we never missed a chance to make it whenever we came by berries. Which was either when we went to our citrus orchard in the outskirt of Sari (the city we lived in, in Mazandaran provide), or on our way to Tehran sold by the farmers by the road.
When I was preparing for my move to the US, I started to organize all my recipes in a little notebook, and that's when I messed up the recipe. Because ever since then, about 13 years ago, I have failed at making the cake each time. But finally after many trial and errors I finally perfected it this time.
Ingredients:
Cake
1 cup fresh or frozen blackberries
2 1/4 cups all purpose flour
1 1/2 teaspoon baking powder
1/4 teaspoon salt
1/3 cup whole milk
1 teaspoon vanilla extract
1/2 cup (1 stick, 4 oz, 100 g) unsalted butter, room temperature
1 1/2 cup sugar
3 large eggs
Whipped Cream Topping
2 cups heavy cream
3 tablespoons powdered sugar
Blackberries for garnish
Directions:
Preheat oven to 350 degrees Fahrenheit. Butter and flour a 9-inch round pan.
Puree the blackberries in food processor or blender. Run the puree through a sieve if you don't like the seeds.
In a medium bowl, whisk together flour, baking powder, and salt; set aside.
In a small bowl, mix together milk, vanilla and blackberry puree; set aside.
In the bowl of an electric mixer fitted with the paddle attachment, beat butter and sugar until light and fluffy, about 3 to 5 minutes. Add eggs one at a time until incorporated into the batter.
With the mixer on low, alternately add flour mixture in 3 parts and milk mixture in 2, beginning and ending with flour mixture; mix just until combined. Spread batter in prepared pan and bake for 35 to 40 minutes, until a toothpick inserted in center of cake comes out clean.
Cool in the pan for 10 minutes; invert onto a wire rack to cool completely.
Using a serrated knife, split cake in half horizontally' place bottom half, cut side up, on a serving plate.
Make topping:
Using an electric mixer fitted with a wire attachment, beat cream until very soft peaks form. Continue to beat and gradually add powdered sugar until soft peaks form.
Top the bottom layer of cake with 1/3 of the whipped cream, cover with top half of cake, cut side down. Top cake with remaining whipped cream, cover the edges and all sides with the whipped cream, and decorate with blackberries.
When I was preparing for my move to the US, I started to organize all my recipes in a little notebook, and that's when I messed up the recipe. Because ever since then, about 13 years ago, I have failed at making the cake each time. But finally after many trial and errors I finally perfected it this time.
Ingredients:
Cake
1 cup fresh or frozen blackberries
2 1/4 cups all purpose flour
1 1/2 teaspoon baking powder
1/4 teaspoon salt
1/3 cup whole milk
1 teaspoon vanilla extract
1/2 cup (1 stick, 4 oz, 100 g) unsalted butter, room temperature
1 1/2 cup sugar
3 large eggs
Whipped Cream Topping
2 cups heavy cream
3 tablespoons powdered sugar
Blackberries for garnish
Directions:
Preheat oven to 350 degrees Fahrenheit. Butter and flour a 9-inch round pan.
Puree the blackberries in food processor or blender. Run the puree through a sieve if you don't like the seeds.
In a medium bowl, whisk together flour, baking powder, and salt; set aside.
In a small bowl, mix together milk, vanilla and blackberry puree; set aside.
In the bowl of an electric mixer fitted with the paddle attachment, beat butter and sugar until light and fluffy, about 3 to 5 minutes. Add eggs one at a time until incorporated into the batter.
With the mixer on low, alternately add flour mixture in 3 parts and milk mixture in 2, beginning and ending with flour mixture; mix just until combined. Spread batter in prepared pan and bake for 35 to 40 minutes, until a toothpick inserted in center of cake comes out clean.
Cool in the pan for 10 minutes; invert onto a wire rack to cool completely.
Using a serrated knife, split cake in half horizontally' place bottom half, cut side up, on a serving plate.
Make topping:
Using an electric mixer fitted with a wire attachment, beat cream until very soft peaks form. Continue to beat and gradually add powdered sugar until soft peaks form.
Top the bottom layer of cake with 1/3 of the whipped cream, cover with top half of cake, cut side down. Top cake with remaining whipped cream, cover the edges and all sides with the whipped cream, and decorate with blackberries.
دستور اصلی این کیک بر میگرده به دوره نوجوانی ام که تازه شروع به آشپزی کرده بودم. دستور مال گیتی جون، یکی از دوستهای خانوادگی مون بود که از سوئد با خودش به ایران اورده بود. ما انقدر این کیک رو دوست داشتیم که هر وقت دستمون به توت سیاه و تمشک میرسید درستش میکردیم. که اون موقع ها تو ساری و تو جاده فیروزکوه پر بود از فروشنده هایی که سطل های پر تمشک و توت میفروختن.
قبل از اینکه عازم امریکا بشم، شروع کردم دستور غذاها رو مرتب کردن و همه رو توی یک دفترچه نوشتن، که فکر میکنم اون موقع دستور رو خراب کردم چون هر چی از اون به بعد سعی کردم که کیک رو درست کنم کیکم خمیر شد. حالا بالاخره بعد از ١٣ سال تلاش لم کیک دستم اومد.
مواد لازم:
کیک
توت سیاه، ١ پیمانه، تازه یا یخ زده
آرد، ١/٤ ٢ پیمانه
بیکینگ پودر ١/٢ ١ قاشق مربا خوری
نمک ١/٤ قاشق مربا خوری
شیر ١/٣ پیمانه
وانیل ١ قاشق مربا خوری
کره نرم شده ١/٢ پیمانه، حدود ١٠٠ گرم
شکر، ١/٢ پیمانه
تخم مرغ ٣ عدد درشت
تزئین کیک
خامه ٢ پیمانه
پودر قند ٣ قاشق سوپخوری
توت سیاه برای تزئین
طرز تهیه
فر را روی درجه ۳۵۰ روشن کنید تا گرم شود، یک ظرف گرد به قطر ٢٣ سانتیمتری را چرب کنید و آرد بپاشد.
توتها را در مخلوط کن پوره کنید و اگر تخم های توت را دوست ندارد میتونین پوره را از صافی رد کنید.
توی یک کاسه، آرد را با بکینگ پودر و نمک مخلوط کنید.
در یک کاسه جدا شیر را با پوره توت و وانیل مخلوط کنید.
با همزن کره را با پیمانه شکر انقدر بزنید تا مایه نرم شود. تخم مرغ ها را یکی یکی به مایه اضافه کنید و خوب مخلوط کنید. مخلوط آرد و شیر را کم کم و یکی در میان اضافه کنید. به نحوی که اول و آخرین مرحله آرد باشد. مخلوط را در ظرف بریزید.
کیک را بپزید تا یک خلال دندان را که در آن تست میکنید چیزی به آن نچسبد، حدود ٣٥ تا ٤٠ دقیقه. کیک را بگذارید توی ظرف حدود ۱۰ دقیقه خنک شود، سپس آنرا روی یک توری بر گردانید و بگذارید تا کاملا خنک شود. کیک را افقی به دو قسمت تقسیم کنید و قسمت پایین را روی ظرفی که میخواهین سرو کنید قرار دهید.
خامه را در یک ظرف بزرگ بزنید و شروع کنید به زدن خامه. وقتی خامه شروع کرد به فرم گرفتن پودر قند را کم کم به آن اضافه کنید. همینطور هم بزنید تا خامه سفت شود.
یک سوم خامه را روی نیمه پایینی کیک بمالید، و با نیمه دوم کیک بپوشانید و روی کیک و اطراف کیک را با خامه بپوشانید. و با توت سیاه تزئین کنید.
Thursday, July 25, 2013
Iced Melon (Aab Talebi) آب طالبی
One of my absolute favorite summertime drinks is aab talebi (iced melon). It is one of Mr. Dad's specialties! I remember in the hot and humid summer days of Mazandaran (northern province of Iran) nothing would cool our bodies and souls like a large glass of aab talebi. As a teenager I used to be able to chug down 3 large glasses full of aab talebi in one sitting! Now, I don't think I can do that without ending up in the hospital's emergency room.
Serves 2-3 people
Ingredients
1 medium melon (about 1 3/4 lb)
2 cups ice cubes
1/4 cup sugar
1 tablespoon rosewater
Directions
Cut the melon in half, and remove the seeds using a spoon. Remove the skin and cut the melon in cubes.
In a blender, put the cut up melons with the ice cubes, sugar and rosewater. Blend until the ice has crushed. Adjust the sweetness to your liking and serve.
محبوبترین نوشیدنی تابستونی اینجانب آب طالبی هست که آقای پدر استاد درست کردنش هست. توی تابستونهای داغ و شرجی مازندران هیچ چیزی مثل یک آب طالبی تگرگی روح و جون آدم رو خنک نمیکنه. دوره نوجوانی میتونستم ٣ تا لیوان بزرگ آب طالبی رو در یک نشست سر بکشم. که الان اگر بخوام این کار رو بکنم شانس اوردم اگر پام به اورژانس کشیده نشه!
مواد لازم برای ٢ الی ٣ نفر
(طالبی متوسط ١ عدد (حدود ٧٥٠ گرم
یخ ٢ پیمانه
شکر ١/٤ پیمانه
گلاب ١ قاشق سوپخوری
طرز تهیه
طالبی را نصف کنید و با قاشق تخم ها را جدا کنید. پوست طالبی را بگیرید و طالبی را خورد کنید.
طالبی را با یخ، شکر و گلاب توی مخلوط کن بریزید و مخلوط کنید تا یخ خورد شود. شیرینی آب طالبی را به اندازه دلخواه میزان کنید و سرو کنید.
Sunday, July 7, 2013
Green Beans with Tomatoes, Olives, and Eggs لوبیا سبز با گوجه فرنگی، زیتون و تخم مرغ
What to cook for one in less than 10 minutes that's both healthy and delicious!? I give you green beans with tomatoes, olives, and eggs. You'll love it so much you won't miss the carb packed meals.
Recipe adapted from Martha Stewart
Serves 1-2 people
Ingredients
8 oz green beans, trimmed
1/4 cup grape tomatoes, halved
1/2 cup Kalamata olives, pitted and halved
1 teaspoon extra-virgin olive oil
1 tablespoon freshly squeezed lemon juice
1 hard-cooked eggs, chopped
Coarse salt and ground pepper
Directions
In a large pot of boiling salted water, cook beans until crisp-tender, 3 minutes. Drain; rinse under cold water. Halve beans and place in a bowl; add tomatoes, olives, oil, lemon juice, and eggs. Season with salt and pepper.
Recipe adapted from Martha Stewart
Serves 1-2 people
Ingredients
8 oz green beans, trimmed
1/4 cup grape tomatoes, halved
1/2 cup Kalamata olives, pitted and halved
1 teaspoon extra-virgin olive oil
1 tablespoon freshly squeezed lemon juice
1 hard-cooked eggs, chopped
Coarse salt and ground pepper
Directions
In a large pot of boiling salted water, cook beans until crisp-tender, 3 minutes. Drain; rinse under cold water. Halve beans and place in a bowl; add tomatoes, olives, oil, lemon juice, and eggs. Season with salt and pepper.
یکی از محبوبترین دستور غذاهای فعلی من که هم سالم هست، هم خوشمزه و بهتر از همه زیر ١٠ دقیقه حاضر همین لوبیا سبز با گوجه و زیتون و تخم مرغ هست. بهتون قول میدم که انقدر ازش خوشتون میاد که دلتون برای غذاهای پر چرب و پرنشاسته تنگ نمیشه!
مواد لازم
برای یک الی دو نفر
لوبیا سبز پاک شده، ٢٥٠ گرم
گوجه فرنگی ریز نصف شده ١/٤ پیمانه
زیتون بدون هسته کالاماتا ١/٤پیمانه، نصف شده
یک قاشق مربا خوری روغن زیتون
یک قاشق غذاخوری آب لیمو تازه
یک عدد تخم مرغ پخته شده خورد شده
نمک و فلفل
طرز تهیه
یک قابلمه بزرگ را پر آب و نمک کنید و به جوش بیاورید. لوبیا ها را برای مدت ٣ دقیقه توی آب جوش بپزید تا کامی پخته شوند ولی هنوز زیر دندون بیان. لوبیا ها را آبکش کنید و روی آنها را آب سرد بپاشد تا خنک شوند. لوبیا ها را نصف کنید و در ظرف بریزید. گوجه فرنگی، زیتون، روغن، آب لیمو و تخم مرغ و نمک و فلفل را اضافه کنید.
Tuesday, June 18, 2013
Sweet Peach Olive Oil Cake کیک هلو با روغن زیتون
I'm a sucker for weird combinations, so when I saw the recipe for this cake on the latest issue of Food&Wine I knew I had to make it.
The olive oil taste was very noticeable immediately after the cake was out of the oven, but the next day I couldn't taste it at all. So If you're curious about making the cake but worried that you might not like it, you should worry no more! If you really loved it just make sure you eat the whole thing on the first day, and if not just save the rest for the next day!
Ingredients
3 ripe peaches, thinly sliced
1 1/2 cups extra-virgin olive oil
1 cup plus 2 tablespoons sugar
1/2 teaspoon kosher salt
3 large eggs
2 cups all-purpose flour
1/2 teaspoon baking powder
1/2 teaspoon baking soda
Sweetened vanilla Greek yogurt or vanilla ice cream, for serving
Directions
Preheat the oven to 350 degrees Fahrenheit. Line a 9-by-13-inch baking pan with parchment paper and coat with vegetable oil spray. In a bowl, toss the peaches with 1/4 cup of the olive oil, 1/4 cup plus 2 tablespoons of the sugar and the salt. Let stand until juicy, about 15 minutes.
In a bowl, whisk the eggs, the remaining 3/4 cup of sugar and 1 1/4 cups of olive oil. In another bowl, whisk the flour, baking powder and baking soda. Whisk the dry ingredients into the egg mixture. fold in the peaches and juices. Scrape the batter into the pan; bake for 35 minutes, until golden and a toothpick inserted into the center comes out clean. Let cool slightly, then serve with ice cream.
من عاشق مخلوط های عجیب غریبم، برای همین تا دستور این کیک رو دیدم تصمیم گرفتم که درستش کنم.
مزه روغن زیتون رو همون روز اول تو کیک میشد تشخیص داد، ولی فرداش هر چقدر دقت کردم نتونستم مزه اش رو تشخیص بدم! برای همین نگران نباشین که آیا از مزه کیک خوشتون میاد یا نه، اگر خوشتون اومد همون روز کیک رو نوش جان کنید اگر
هم نه بزارینش واسه روز بعد!
مواد لازم
هلو رسیده ٣ عدد، نازک خرد کنید
روغن زیتون ١/٢ ١ پیمانه
شکر ١ پیمانه و ٢ قاشق غذاخوری
نمک ١/٢ قاشق مربا خوری
تخم مرغ درشت ٣ عدد
آرد ٢ پیمانه
بیکینگ پودر ١/٢ قاشق مربا خوری
جوش شیرین ١/٢ قاشق مربا خوری
بستنی وانیلی برای سرو کردن
طرز تهیه
فر را روی درجه ٣٥٠ فارنهایت یا ١٨٠ سانتیگراد روشن کنید تا گرم شود. ته یک قالب کیک ٢٣ در ٣٣ سانتی متری را کاغذ روغنی بیندازید و چرب کنید. در یک کاسه هلوها را با ١/٤ پیمانه روغن زیتون، ١/٤ پیمانه و ٢ قاشق غذاخوری شکر و نمک مخلوط کنید. برای ١٥ دقیقه بگذارید بماند تا آب بیندازد.
در یک کاسه دیگر تخم مرغ ها را با باقی ٣/٤ پیمانه شکر و ١/٤ ١ پیمانه روغن زیتون هم بزنید. در ظرف جدایی آرد را با بیکینگ پودر و جوش شیرین قاطی کنید. مخلوط آرد را مخلوط تخم مرغ اضافه کنید و انقدر هم بزنید تا مخلوط شود.هلو را همراه با آبی که انداخته اضافه کنید و مخلوط کنید. مایه را توی قالب کیک بریزید و بگذارید برای ٣٥ دقیقه بپزد تا روی کیک طلایی شود. کیک که کمی خنک شد با بستنی وانیلی سرو کنید.
Monday, October 1, 2012
Eggplant with Eggs (Mirza Ghasemi) میرزا قاسمی
After three years of writing in this blog, I think it's time to
confess my biggest food scare!
Eggplants! The beautiful purple eggplant whose close siblings,
tomato and squash, I absolutely love, is "the" only thing I cannot
bring myself to eat.
This is going to be even more embarrassing to admit to my Persian
speaking readers, since foods made with eggplants are so popular in Iranian
culture. In Persian gatherings it's almost guaranteed that one of the many
Iranian dishes made with eggplant is present on the dinner table, and every
time my relatives try to convince me that the specific dish is out of the
world and I would definitely like it. Out of respect (and with a little hope
that it might actually taste different this time), I give it another try, but I
always find it taste the same in my mouth!
So why am I posting this recipe when obviously I can’t have any
culinary authority in foods made with eggplants!? Well apparently the Camera
girl had made this dish for dinner once for her friends in London, and ever
since then her friends are asking her for the recipe. Having to write a 10,000
word dissertation the last thing she needed was spending time translating a
recipe. So, without a moment hesitation she started asking me to post this
recipe a couple months ago and have been bugging me ever since for an udate. I
have been hesitating the post because let’s face it, I have to actually make
the dish first and the last thing I want to do is spend time cooking something I’m
not even going to taste.
Well that moment has finally arrived and as the “Mmms” and “Wows”
of Mr. Dad confirmed apparently it turned out okay.
A little background about mirza ghasemi;
This is a dish famous in northern province of Iran, Mazandaran,
and as it is common in most northern Iranian dishes it is made with lots of
garlics. So I obviously don’t suggest you make this for a romantic dinner, even
if you and your significant other absolutely love eggplants!
Ingredients:
6 small eggplants or 3 large ones
1/2 cup vegetable oil
1 head of garlic, peeled, and finely chopped
1/2 teaspoon turmeric
4 large tomatoes, skin removed and chopped into chunks
4 large eggs
Salt and pepper
Directions:
Roast the eggplants over a charcoal grill* turning them so they get charred on all sides. Once the eggplant skin
is fully chard and black, remove from the grill and using a knife scrape the
skin off. Using the back of the knife slightly mash the eggplants.
Heat the oil in a medium pot over medium heat and add the minced
garlics. Saute for about 1 minute and add turmeric, the chopped tomato and eggplants.
Bring the mixture to a boil, reduce heat to low cover the pot and let it simmer
for about 15 minutes until the tomatoes and eggplants are soft and fully
cooked.
Remove the lead and if there are a lot of liquid let the excess
liquid bubble away. Add salt and pepper to taste.
Break the eggs in a small bowl and whisk them with some salt and
pepper.
While stirring the tomato and eggplant mixture gradually add the
eggs and continue whisking until the eggs are set.
Remove from heat and serve with Persian flatbread and mixed herbs.
* Charring the eggplants over a charcoal grill is preferred as the charcoal gives a charred taste to the eggplants, but you can also char them over a gas grill or in a high temperature oven.
بعد از سه سال که با شما هستم، بالاخره وقت این رسیده که به بزرگترین وحشت غذاییم اعتراف کنم.
بادمجان! بله همان بادمجان بنفش که عاشق هم خانواده اش گوجه فرنگی و کدو هستم تنها غذایی هست که هر کاری میکنم ازش خوشم بیاد نمیتونم.
میدونم الان چی فکر میکنین، "آدم ایرانی باشه و از بادمجون خوشش نیاد". انقدر این رو شنیدم که حد نداره! "یعنی خورش بادمجون، کشک بادمجون، میرزا قاسمی دوست نداری!؟" جواب من هم همیشه با خجالت هست نه! هر بار خانم مادر خورش بادمجون میپزه این عکاس باشی که هنوز هم بادمجون دوست نداشتن من رو درک نمیکنه اسرار میکنه که یک لقمه بخورم. حتا زورم میکنه که یک قاشق خودش برام درست کنه و من بخورم که با کلی فشار به مغز و کلی به خود تلقین کردن که این بار خوشم خواهد آمد امتحان میکنم ولی نه باز هم همانا. گاهی اوقات فکر میکنم که بادمجون اصلآ تو دهان من طعم دیگه ای میده!
حالا حتما میپرسین که چه اسراری داری دستور میرزا قاسمی بزاری وقتی از بادمجان خوشت نمیاد!؟ خوب داستان از این قرار هست که عکاس باشی چند ماه پیش که هنوز لندن بود یک میرزا قاسمی برای دوستان غیر ایرانیش درست کرده بوده و این دوستان هم یک دل نه صد دل عاشق این میرزا قاسمی شدن و به التماس دستورش افتادن. و از اون جایی که عکاس باشی خانم در این چند ماه گذشته بد جور مشغول تحقیق و نوشتن پایان نامه دانشگاه بود، آخرین چیزی که میخواست سرش رو باهاش درد بیاره همین ترجمه دستور میرزا قاسمی بود که از من خواست اینجا براش پست کنم. من هم بالاخره این دستور رو پست کردم که با اینکه خودم ازش نچشیدم ظاهرا با شمردن به به های آقای پدر خوب از آب در اومد.
مواد لازم:
بادمجان کوچک ۶ عدد یا ۳ عدد بادمجان درشت
روغن مایع ۱/۲ پیمانه
یک بوته سیر پوست گرفته شده و له شده
زرد چوبه ۱/۲ قاشق مربا خوری
گوجه فرنگی درشت ۴ عدد پوست گرفته شده و خرد شده
تخم مرغ ۴ عدد
نمک و فلفل
طرز تهیه:
بادمجان ها را روی زغال برشته کنید (روی گاز یا حتا توی فر هم میتونین برشته کنین ولی ظاهرا روی زغال خوشمزه تره). هر از چند گاهی بچرخانید که همه قسمت های بادمجان برشته شود. هر وقت پوست بادمجان کاملا برشته و سیاه شد از روی آتش بردارید و با چاقو پوست آن را بتراشید. با پشت چاقو بادمجان را کمی له کنید.
روغن را در یک تابه متوسط روی حرارت متوسط داغ کنید و سیر له شده را اضافه کنید. بعد از یک دقیقه تفت دادن زرد چوبه و گوجه فرنگی و بادمجان را اضافه کنید. مخلوط را به جوش بیاورید بعد شعله را کم کنید، در تابه را بگذارید و برای ۱۵ دقیقه بگذارید کم کم بجوشد تا گوجه فرنگی ها و بادمجان کاملا پخته و له شوند. در تابه را بر دارید و اگر گوجه و بادمجان خیلی آب انداخته بودند بگذارید کمی آب آنها تبخیر شوند. نمک و فلفل را اضافه کنید.
تخم مرغ ها را در یک کاسه متوسط بشکنید و با کمی نمک خوب بزنید.
در حالی که مخلوط گوجه و بادمجان را هم میزنید تخم مرغ را کم کم اضافه کنید. میرزا قاسمی را همینطور هم بزنید تا تخم مرغ ها ببندند.
هر وقت تخم مرغ کاملا پخت، میرزا قاسمی را با نان و سبزی خوردن سرو کنید.
Monday, September 10, 2012
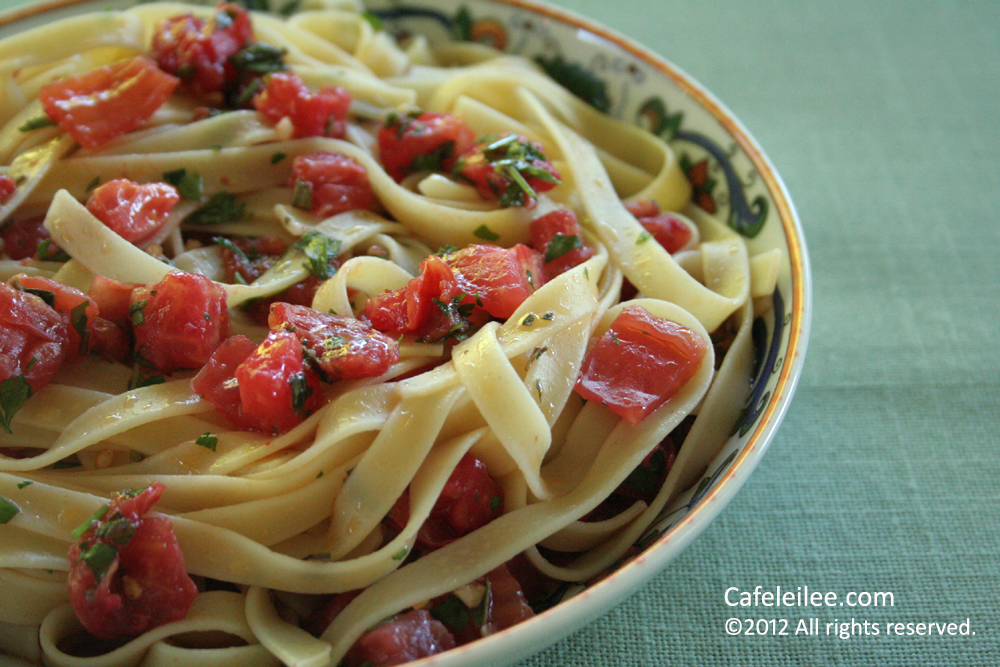
Pasta with Fresh Tomato Sauce اسپاگتی با سس گوجه فرنگی تازه
This is the ultimate lazy, healthy, Sunday meal. It takes little time to make this dish, and it's loaded with delicious tomatoes (not so healthy with the carbs though, but who cares!). Need I say more!?
Buon Appetito!
Serves 4
Ingredients
4 large tomatoes
2 garlic cloves, finely chopped
4 tbsp chopped fresh herbs such as basil, marjoram, oregano, or parsley
1 lb spaghetti*
*I would normally make this with spaghetti but since I only had fettuccine I just decided to go with that, so feel free to use any pasta of any shape and form.
Directions
Skin the tomatoes by placing in boiling water for 1 minute - no longer or they will become mushy.
Lift out with a perforated spoon and plunge into a bowl of cold water. Peel off the skin, then dry the tomatoes o paper towels.
Halve the tomatoes and squeeze out the seeds. Chop into 1/4 inch cubes and mix with the garlic, herbs, olive oil, and seasoning in a non-metallic bowl. Cover and allow the flavors to mellow for at least 30 minutes.
Cook the pasta in plenty of boiling salted water.
Drain the pasta and mix with the sauce. Cover with a lid and leave for 2-3 minutes, toss again, and serve immediately.
Buon Appetito!
Serves 4
Ingredients
4 large tomatoes
2 garlic cloves, finely chopped
4 tbsp chopped fresh herbs such as basil, marjoram, oregano, or parsley
1 lb spaghetti*
*I would normally make this with spaghetti but since I only had fettuccine I just decided to go with that, so feel free to use any pasta of any shape and form.
Directions
Skin the tomatoes by placing in boiling water for 1 minute - no longer or they will become mushy.
Lift out with a perforated spoon and plunge into a bowl of cold water. Peel off the skin, then dry the tomatoes o paper towels.
Halve the tomatoes and squeeze out the seeds. Chop into 1/4 inch cubes and mix with the garlic, herbs, olive oil, and seasoning in a non-metallic bowl. Cover and allow the flavors to mellow for at least 30 minutes.
Cook the pasta in plenty of boiling salted water.
Drain the pasta and mix with the sauce. Cover with a lid and leave for 2-3 minutes, toss again, and serve immediately.
این ماکارونی جون میده برای روزهای تعطیل که حوصله آشپزی ندارین ولی میخواین غذای سالم بخورین. کل غذا شاید نیم ساعت
طول بکشه که حاضر بشه و در عین حال پر از طعم خوب گوجه فرنگی هست.
مواد لازم برای ۴ نفر
گوجه فرنگی درشت ۴ عدد
سیر ۲ حبه له شده
سبزی خوش عطر ایتالیایی ۴ قاشق غذاخوری خرد شده ( مثل پونه کوهی، مرزنجوش، ریحان، و جعفری)
*اسپاگتی ۵۰۰ گرم
*من معمولا این غذا رو با اسپاگتی درست میکنم، ولی این دفعه چون اسپاگتی نداشتم با فتوچینی درست کردم.
طرز تهیه
گوجه فرنگی ها را برای یک دقیقه توی آب جوش بندازید، بعد فوری به یک کاسه آب یخ منتقل کنید. پوست گوجه فرنگی را جدا کنید و گوجه فرنگی ها را با یک حوله خشک کنید.
گوجه فرنگی را نصف کنید و هسته های گوجه فرنگی را خارج کنید. سپس گوجه را به صورت نگینی خرد کنید. در یک کاسه بزرگ گوجه فرنگی را با روغن زیتون، سبزی ها و سیر مخلوط کنید و بگذارید در دمای معمولی برای ۳۰ دقیقه مواد طعم همدیگر را خوب بگیرند.
در این مدت اسپاگتی را طبق دستور روی بسته بپزید. اسپاگتی را آبکش کنید و به مخلوط گوجه فرنگی اضافه کنید. ماکارونی را خوب مخلوط کنید، روی کاسه را برای ۲ تا ۳ دقیقه بپوشانید سپس دوباره هم بزنید و سرو کنید.
Saturday, August 4, 2012
Tomato Rice (Kateh Gojeh Farangi) کته گوجه فرنگی یا استامبولی پلو
Summer means different things to different people. To some, it's the season of shorts and summer dresses, others get excited about beach time and pool parties, and then there are those like me who get excited about all the produces that start to appear in the farmers market. I told you before, summer always seems like a marathon for me. There are just so many things I like to cook with and preserve which I don't get the time to do half of them.
Out of all the produces summer has to offer what excites me the most are tomatoes. Nothing beats the taste of freshly picked in season tomatoes. Besides the Marinara sauce, and the Persian tomato omelet what I crave for in the summer is the taste of kateh gojeh farangi. The juice from the tomatoes help cook the rice and what remains of them is the concentrated flavor of tomato which compares to nothing you have ever tasted.
This rice dish is also known as Istambuli Polow, the name Istambuli Polow refers to the kind of potato normally used in this dish known as Istambuli potatoes (which are known as fingerling potato in the U.S.). Given that the rice is cooked in kateh style and not polow style*, I decided to call it kateh gojeh farangi (gojeh farangi meaning tomato).
*For more information on different styles of cooking Persian rice click here.
Ingredients (for 4 people)
2 lbs. Tomatoes chopped into large chunks
2 1/3 cups rice
3 teaspoons salt
1 lbs. fingerling or Yukon gold potatoes, peeled and cut into 1/2 inch cubes
1 tablespoon tomato paste
1 onion, thinly sliced
1/2 cup vegetable oil
Directions
Crush the tomatoes in a food processor or blender and run the juices through a sieve to extract the seeds.
Place rice in a large bowl and cover with water. Agitate with your hand, and avoid breaking the rice grains, then pour off the water. Repeat this 3 to 4 more times until the water is clear.
In a large non-stick pot soak the drained rice with tomato juice. Add salt and potatoes. Dissolve the tomato paste into one cup of water and add to the rice.
Let the rice soak in the tomato juice for 2 to 4 hours.
In the meantime fry the onions in 4 tablespoons of vegetable oil until golden brown.
Place the rice pot over high heat until it starts to bubble uncovered. Reduce the heat to medium high and stir frequently. Once the rice has absorbed most of the water and there's just a little water at the bottom of the pot add the fried onions stir quickly and pour the vegetable oil over the rice, reduce the heat to medium and cover.
Let the rice steam for about 10 minutes, then reduce the heat to medium low, remove the lead and cover the bot with a clean towel or 3 layers of paper towel and cover with the lead firmly.
Let the rice steam for 45 minutes longer, then invert into a platter.
Out of all the produces summer has to offer what excites me the most are tomatoes. Nothing beats the taste of freshly picked in season tomatoes. Besides the Marinara sauce, and the Persian tomato omelet what I crave for in the summer is the taste of kateh gojeh farangi. The juice from the tomatoes help cook the rice and what remains of them is the concentrated flavor of tomato which compares to nothing you have ever tasted.
This rice dish is also known as Istambuli Polow, the name Istambuli Polow refers to the kind of potato normally used in this dish known as Istambuli potatoes (which are known as fingerling potato in the U.S.). Given that the rice is cooked in kateh style and not polow style*, I decided to call it kateh gojeh farangi (gojeh farangi meaning tomato).
*For more information on different styles of cooking Persian rice click here.
Ingredients (for 4 people)
2 lbs. Tomatoes chopped into large chunks
2 1/3 cups rice
3 teaspoons salt
1 lbs. fingerling or Yukon gold potatoes, peeled and cut into 1/2 inch cubes
1 tablespoon tomato paste
1 onion, thinly sliced
1/2 cup vegetable oil
Directions
Crush the tomatoes in a food processor or blender and run the juices through a sieve to extract the seeds.
Place rice in a large bowl and cover with water. Agitate with your hand, and avoid breaking the rice grains, then pour off the water. Repeat this 3 to 4 more times until the water is clear.
In a large non-stick pot soak the drained rice with tomato juice. Add salt and potatoes. Dissolve the tomato paste into one cup of water and add to the rice.
Let the rice soak in the tomato juice for 2 to 4 hours.
In the meantime fry the onions in 4 tablespoons of vegetable oil until golden brown.
Place the rice pot over high heat until it starts to bubble uncovered. Reduce the heat to medium high and stir frequently. Once the rice has absorbed most of the water and there's just a little water at the bottom of the pot add the fried onions stir quickly and pour the vegetable oil over the rice, reduce the heat to medium and cover.
Let the rice steam for about 10 minutes, then reduce the heat to medium low, remove the lead and cover the bot with a clean towel or 3 layers of paper towel and cover with the lead firmly.
Let the rice steam for 45 minutes longer, then invert into a platter.
تابستون برای هر کس یک معنی داره. بعضی ها به ساحل هجوم میبرن و اون هایی هم که فرصت ساحل رفتن ندارن به بالا پشتبون میرن تا پدر پوست بیچارشون رو در بیاران. بعضی ها هوای خوب رو غنیمت میدونن و شروع میکنن به سفر کردن. یک دسته هم مثل من دستهاشون رو به هم میمالن و منتظر محصولات خوشمزه تابستون میشن. قبلا تو این بلاگ گفتم که تابستون برای من مثل یک مسابقه دو ماراتون هست که همش باید بجنبم که با همه محصولات غذا و کیک و شیرینی و مربا درست کنم.
تو تمام محصولات تابستون چیزی که از همه بیشتر براش هیجان دارم گوجه فرنگی هست. هیچ کدوم از گوجه فرنگی های باغچه کد بانو به هدر نمیره. به غیر از املت و سس مارینارا، این کته گوجه فرنگی جزو غذاهای محبوب تابستونی کافه لیلی هست. برنج با آب گوجه فرنگی پخته میشه و چیزی که از گوجه فرنگی میمونه طعم تغلیظ شده گوجه فرنگی هست که به هیچ وجه نمیشه با چیز دیگه ای مقایسه اش کرد.
کته گوجه فرنگی بیشتر به نام استامبولی پلو معروف هست، به احتمال زیاد به خاطر اینکه سیب زمینی استامبولی توش استفاده میشه. ولی از اونجایی که طرز پخت این غذا به روش کته ای هست نه پلو من تصمیم گرفتم کته گوجه فرنگی خطابش کنم.
مواد لازم (برای ۴ نفر)
گوجه فرنگی، رنده و از الک رد شده ۹۰۰ گرم
برنج ۱/۳ ۲ پیمانه
نمک ۳ قاشق مربا خوری
سیب زمینی استامبولی، خرد شده به صورت مکعبی
۵۰۰ گرم
رب گوجه فرنگی ۱ قاشق غذا خوری
پیاز داغ ۶ قاشق غذاخوری (معادل با یک پیاز سرخ شده)
روغن مایع ۱/۲ پیمانه
طرز تهیه
برنج را بشویید و آب اضافی برنج را جدا کنید.
رب گوجه فرنگی را در یک پیمانه آب حال کنید و محلول را به همراه آب گوجه فرنگی، نمک و سیب زمینی به برنج بیافزایید تا برنج با آب گوجه به مدت ۲ تا ۴ ساعت خیس بخورد.
در یک قابلمه نچسب مناسب برنج را روی حرارت زیاد به جوش بیاورید (بدون درب) سپس حرارت را روی متوسط تا زیاد بیاورید تا بجوشد در این مدت هر از چند گاهی برنج را هم بزنید تا ته نگیرد. چند جوش که زد و آب تقریبا تبخیر شد، پیاز داغ را اضافه کنید سریع هم بزنید و روغن را به برنج اضافه کنید و حرارت را روی متوسط بیاورید. در قابلمه را بگذارید تا برنج بخارکند. بعد از حدود ۱۰ دقیقه حرارت را ملایم کنید و در قابلمه را با دم کنی یا حوله تمیز بپوشانید و روی قابلمه قرار دهید. برنج بعد از حدود ۴۵ دقیقه دیگر حاضر است.
Sunday, July 15, 2012
Apricot Jam مربای زرد آلو
Jam making had been cursed for me in the past couple of years! The first misfortune was with kumquat jam. After hours of seeding those tiny suckers, I wasted my hard work by burning the jam and having to throw the whole thing away.
Then it was time to burn some beautiful raspberries last summer in the same manner. I left it on the stove top and went to grab my book and finish the chapter I was reading, thinking that by the time I finish the chapter it'll be about 10 minutes, and I can go check on my jam. But oh boy that book I was reading was so fascinating that I just forgot the whole jam making thing and moved on to the next chapter and the next and the next, until the funky burnt smell got my attention and had me running to the kitchen.
The third strike was last week, when our lovely friend, Mozhgan joon, graciously brought us a big bag of her garden's apricots. Yours truly, who at this point still had not learnt her lesson, started to make a jam with some of them while working from home. [Shout out to those of you who think you'll get a lot done when you work from home, I CREATE more work for myself when I work from home!] I went back to my laptop and continued working, this time I didn't even smell the jam burning! My mom sensed it and went to its rescue.
Two days later, with the collaboration of three wise adults and numerous techniques we were finally able to clear the burnt layer at the bottom of our favorite stainless steel pot!
Iranians have a nice saying that "ta seh nasheh, bazi nasheh", which is the equivalent of "third time's a charm"! So with the superstitious belief that my bad luck must have been reversed by now I set out to make the jam again with the remaining apricots. This time I was by the pot stirring and checking the jam and numerously testing for doneness. As you can witness, I am happy to announce that I have successfully reversed my bad fortune on jam making!
Recipe adapted from my all time favorite food writer and blogger David Lebovitz
Then it was time to burn some beautiful raspberries last summer in the same manner. I left it on the stove top and went to grab my book and finish the chapter I was reading, thinking that by the time I finish the chapter it'll be about 10 minutes, and I can go check on my jam. But oh boy that book I was reading was so fascinating that I just forgot the whole jam making thing and moved on to the next chapter and the next and the next, until the funky burnt smell got my attention and had me running to the kitchen.
The third strike was last week, when our lovely friend, Mozhgan joon, graciously brought us a big bag of her garden's apricots. Yours truly, who at this point still had not learnt her lesson, started to make a jam with some of them while working from home. [Shout out to those of you who think you'll get a lot done when you work from home, I CREATE more work for myself when I work from home!] I went back to my laptop and continued working, this time I didn't even smell the jam burning! My mom sensed it and went to its rescue.
Two days later, with the collaboration of three wise adults and numerous techniques we were finally able to clear the burnt layer at the bottom of our favorite stainless steel pot!
Iranians have a nice saying that "ta seh nasheh, bazi nasheh", which is the equivalent of "third time's a charm"! So with the superstitious belief that my bad luck must have been reversed by now I set out to make the jam again with the remaining apricots. This time I was by the pot stirring and checking the jam and numerously testing for doneness. As you can witness, I am happy to announce that I have successfully reversed my bad fortune on jam making!
Recipe adapted from my all time favorite food writer and blogger David Lebovitz
About six 1 cup (250ml) jars
Ingredients:
2 pounds (1kg) fresh apricots
1/2 cup (125ml) water
6 cups (1kg) sugar
1 tablespoon freshly squeezed lemon juice
optional: 1 tablespoon kirsch
Ingredients:
2 pounds (1kg) fresh apricots
1/2 cup (125ml) water
6 cups (1kg) sugar
1 tablespoon freshly squeezed lemon juice
optional: 1 tablespoon kirsch
1. Cut the apricots in half and extract the pits. If you wish, crack a few open and put a kernel in each jam jar you plan to fill. (This gives a nice nutty flavor to the jam)
2. Place the apricots in a very large stockpot, and add the water. Cover the pot and cook, stirring frequently, until the apricots are tender and cooked through.
3. Put a small plate in the freezer.
4. Add the sugar to the apricots and cook, uncovered, skimming off any foam that rises to the surface. As the mixture thickens and reduces, stir frequently to make sure the jam isn’t burning on the bottom.
5. When the jam looks thick and is looks slightly-jelled, turn off the heat and put a small amount of jam on the chilled plate. Put back in the freezer for a few minutes, then do the nudge test: If the jam mounds and wrinkles , it’s done. If not, continue to cook, then re-test the jam until it reaches that consistency.
(You can use a candy thermometer if you wish. The finished jam will be about 220ºF, 104ºC.)
6. Once done, stir in the lemon juice and kirsch, if using, and ladle the jam into clean jars. Cover tightly and let cool to room temperature. Once cool, refrigerate until ready to use.
Storage: I find this jam will keep up to one year if refrigerated. If you wish to can it for long-term preservation, you can refer to the USDA Canning Guidelines for techniques.
مربا درست کردن برای من توی این یکی دو سال اخیر طلسم شده بود. اولین بدشانسی سر مربای کامکوات بود. بعد از ساعتها وقت صرف هسته گرفتن این فسقلی های پر هسته، تمام زحماتم رو با سوزوندن مربا به هدر دادم و مجبور شدم تمام مربا رو دور بریزم.
بعد نوبته مربای تمشک شد که بسزونم. شکر و آب و تمشک رو مخلوط کردم و رفتم باقی یک فصل از کتابم رو بخونم. پیش خودم فکر میکردم که تا این فصل رو تموم کنم یک ده دقیقه ای میگذره و میرسم به مربا سر بزنم. ولی جونم براتون بگه که اون کتابی که میخوندم همچین هیجان داشت که اون فصل رو که تموم کردم که هیچی، فصل بعدی و بعدی و بعدی رو هم ادامه دادم تا اینکه بوی سوختگی رشته مطالعه ام رو پاره کرد و دویدم به سمت آشپزخونه.
سومین هم همین هفته پیش بود، که دوست عزیزمون، مژگان جون، زحمت کشیدن و یک کیسه بزرگ زرد آلو حیاتشون رو برامون آوردن. این بنده حقیر هم که هنوز درسم رو یاد نگرفتم در حالی که از خونه کار میکردم شروع کردم مربا درست کردن با این زرد آلو های آبدار. [ قابل توجه تمام دوستانی که فکر میکنن با از خونه کار کردن میشه به خیلی کار ها رسید، اینجانب برای خودم کار زیاد میکنم وقتی که از خونه کار میکنم!] خلاصه دوباره همون برنامه شد و ما مواد مربا رو ریختیم تو قابلمه و رفتیم سر لپ تاپ. این دفعه که اصلا خودم هم متوجه بوی سوختگی نشدم. خانم مادر متوجه بوی سوختگی شد و رفت به نجات قابلمه.
بعد از دو روز تلاش سه تا آدم بزرگ و امتحان هر جور تکنیک بلاخره موفق شدیم که لایه سوخته ته قابلمه استیل خانوم مادر رو تمیز کنیم. بنده هم عزمم رو جزم کردم و گفتم تا سه نشه بازی نشه. دیگه نمیزارم این اتفاق بیفته. باقی زرد آلو ها رو مربا کردم و از اول تا آخر بالا سر مربا بودم و چند بار تست کردم تا مطمئن شم مربا آماده است. الان هم از اونجایی که شاهد هستین موفق شدم که این طلسم مربا پزی رو خنثی کنم.
مواد لازم برای حدود ۶ پیمانه مربا
زرد آلو تازه، ۱ کیلوگرم
آب، ۱ پیمانه یا ۱۲۵ میلی لیتر
شکر، ۶ پیمانه یا ۱ کیلوگرم
آب لیمو، ۱ قاشق غذاخوری
کیرش(یک نوع مشروب آلمانی)، ۱ قاشق غذاخوری (در صورت تمایل)
طرز تهیه
۱. زرد آلو ها را از وسط نصف کنید و هسته آنها را خارج کنید. در صورت تمایل چند تا از هسته ها را بشکنید و مغز یک دانه را ته یک ظرف مربا بگذارید (مغز هسته زرد آلو مزه خوبی به مربا میدهد)
۲. زرد آلو ها را در یک قابلمه بزرگ قرار دهید و آب را اضافه کنید. در قابلمه را بگذارید و زرد آلو را بپزید تا نرم شود. هر از چند گاهی زرد آلو ها را کمی هم بزنید.
۳. یک بشقاب کوچک را در فریزر بگذارید.
۴. شکر را به زرد آلو ها اضافه کنید و مربا را بدون در بپزید و کف روی مربا را مدام بگیرید. مربا را هر از چند گاهی هم بزنید تا ته نگیرد و نسوزد.
۵. هر وقت فکر میکنید که مربا آماده است یک قاشق از مربا رو روی بشقابی که تو فریزر گذاشتین بریزید و برای یکی دو دقیقه تو فریزر بگذارید. بعد ظرف را خارج کنید و از گوشه مربا را کمی فشار دهید. اگر مربا چروک خورد یعنی مربا آماده هست. اگر نه چند دقیقه دیگر این کار را تکرار کنید تا مربا آماده شود.
از یک درجه هم میتوانید استفاده کنید، که اگر درجه به ۲۲۰ درجه فارنهایت یا ۱۰۴ سانتیگراد رسید یعنی مربا آماده است.
۶. هر وقت مربا آماده شد آب لیمو و کیرش (در صورت تمایل) را به مربا اضافه کنید و هم بزنید و مربا را فوری در شیشه بریزید و در شیشه را ببندید. و بگذارید که مربا داخل شیشه خنک شود. سپس به یخچال منتقل کنید.
این مربا در یخچال برای حدود ۱ سال سالم میماند.
Tuesday, July 3, 2012
Persian Fresh Herb Mix (Sabzi Khordan) سبزی خوردن
It's about time I introduced you to the quintessential Persian side dish, sabzi khordan. What it is, is basically an assortment of different herbs trimmed, washed, and beautifully arranged on a platter. It is eaten as an accompaniment to many Persian dishes and sandwiches. I have given a sneak peak preview of it on couple of my previous posts here and here.
Beside being a side dish, sabzi khordan also serves as a very nostalgic breakfast or afternoon snack. Wrapped in Persian flat bread along with some feta and walnuts, the herbs makes for a very refreshing snack after a siesta.
To prepare sabzi khordan, it's better if you use the Persian equivalent of most herbs like parsley, basil or mint. Persian herbs are more tender and smaller compared to their Western counterparts. You can purchase Persian herbs from most Middle Eastern stores.
Ingredients:
One bunch each of the following herbs
Persian basil (reyhaan)
Persian mint (naanaw)
Garlic chives (tareh)
Persian watercress (shawhi or taretizak)
Tarragon (tarkhoon)
Persian parsley (jaafari)
Green onions (piazcheh)
Radishes (torobcheh)
Directions:
Remove the tough stems and any yellow part of the herbs. Remove the green parts of the green onions and leaves from the radishes.
Cut four slices into the radishes from tips to about 1/2 inch of the bottom so the four slices remain attached. Depending on the size of your green onions cut 2 or more slices into the green onions about 1/3 of the length. The more cuts you make in the green onions the more beautiful it'll look.
Soak all herbs along with radishes and green onions in a very large bowl with plenty of water for about 20 minutes. You need plenty of water and room in the bowl so that the herbs rise to the top and there is room for the dust and mud to sink to the bottom.
Gently transfer the herbs to a colander without disturbing the water. Rinse out the water and clean the bowl. Repeat the soaking and rinsing step until there's no mud at the bottom of the bowl. The segments in the radishes and green onions will open up and start to look like florets.
Spread the herbs on a clean towel and let them dry.
Arrange on a large platter and serve.
Beside being a side dish, sabzi khordan also serves as a very nostalgic breakfast or afternoon snack. Wrapped in Persian flat bread along with some feta and walnuts, the herbs makes for a very refreshing snack after a siesta.
To prepare sabzi khordan, it's better if you use the Persian equivalent of most herbs like parsley, basil or mint. Persian herbs are more tender and smaller compared to their Western counterparts. You can purchase Persian herbs from most Middle Eastern stores.
Ingredients:
One bunch each of the following herbs
Persian basil (reyhaan)
Persian mint (naanaw)
Garlic chives (tareh)
Persian watercress (shawhi or taretizak)
Tarragon (tarkhoon)
Persian parsley (jaafari)
Green onions (piazcheh)
Radishes (torobcheh)
Directions:
Remove the tough stems and any yellow part of the herbs. Remove the green parts of the green onions and leaves from the radishes.
Cut four slices into the radishes from tips to about 1/2 inch of the bottom so the four slices remain attached. Depending on the size of your green onions cut 2 or more slices into the green onions about 1/3 of the length. The more cuts you make in the green onions the more beautiful it'll look.
Soak all herbs along with radishes and green onions in a very large bowl with plenty of water for about 20 minutes. You need plenty of water and room in the bowl so that the herbs rise to the top and there is room for the dust and mud to sink to the bottom.
Gently transfer the herbs to a colander without disturbing the water. Rinse out the water and clean the bowl. Repeat the soaking and rinsing step until there's no mud at the bottom of the bowl. The segments in the radishes and green onions will open up and start to look like florets.
Spread the herbs on a clean towel and let them dry.
Arrange on a large platter and serve.
بلاخره وقتش رسید که یک پست برای خواننده های غیر ایرانی در مورد سبزی خوردن بزارم. از اونجایی که فکر نمیکنم هیچ کدوم از شما خواننده های عزیز ایرانی به دستور سبزی خوردن احتیاج داشته باشین، مواد لازم سبزی خوردن رو برای شما پست نکردم. امیدوارم به دل نگیرین
Monday, June 25, 2012
Strawberry Cake کیک توت فرنگی
Going through my recipe index couple days ago I realized I have posted more recipes for desserts than any other course in this blog. The main reason why I have more dessert recipes here is that I can't finish up a meal without getting my teeth into something sweet. Whether it's a homemade ice cream, a glass of tea with a slice of cake or even some chopped up fruit, I put the seal on my mouth when I had my fair share of sweetness.
This strawberry cake is just what I need when I'm getting closer to dinnertime and I don't have a dessert to enjoy afterwards. It is a very easy cake to make and with strawberries in abundance in this time of the year I can't think of an excuse not to make them more often.
Recipe adapted from Martha Stewart
Ingredients
6 tablespoons unsalted butter, softened, plus more for pie plate
1 1/2 cups all-purpose flour
Recipe adapted from Martha Stewart
Ingredients
6 tablespoons unsalted butter, softened, plus more for pie plate
1 1/2 cups all-purpose flour
- 1 1/2 teaspoons baking powder
- 1/2 teaspoon salt
- 1 cup plus 2 tablespoons sugar
- 1 large egg
- 1/2 cup milk
- 1 teaspoon pure vanilla extract
- 1 pound strawberries, hulled and halved
Directions
- Preheat oven to 350 degrees. Butter a 10-inch pie plate. Sift flour, baking powder, and salt together into a medium bowl.
- Put butter and 1 cup sugar in the bowl of an electric mixer fitted with the paddle attachment. Mix on medium-high speed until pale and fluffy, about 3 minutes. Reduce speed to medium-low; mix in egg, milk, and vanilla.
- Reduce speed to low; gradually mix in flour mixture. Transfer batter to buttered pie plate. Arrange strawberries on top of batter, cut sides down and as close together as possible. Sprinkle remaining 2 tablespoons sugar over berries.
- Bake cake 10 minutes. Reduce oven temperature to 325 degrees. Bake until cake is golden brown and firm to the touch, about 1 hour (the toothpick doneness trick probably won't work as the cooked strawberries on top will make the top a little soggy, but don't worry your cake is done after an hour) . Let cool in pie plate on a wire rack. Cut into wedges. Cake can be stored at room temperature, loosely covered, up to 2 days.
چند روز پیش که فهرست دستور غذاها رو مرور میکردم متوجه شدم که بیشتر از هر وعده غذایی دیگه دستور دسر و شیرینی پست کردم. دلیلش هم از اونجایی که بنده هیچ وعده غذایی رو بدون شیرینی نمیتونم تمام کنم واضح هست. چه بستنی خونگی، چه یک کیک خوشمزه با چای یا حتی میوه شیرین، اینجانب زیپ روی لبم رو موقعی میکشم که شیرینی بعد از غذا رو خورده باشم.
این کیک توت فرنگی بهترین نوع شیرینی هست که میتونین خیلی سریع درست کنین. و با وجود توت فرنگی های فراوانی که توی این فصل پیدا میشه، نمیدونم چه بهانه ای میتونین پیدا کنین که درستش نکنین.
مواد لازم
کره بی نمک ۶ قاشق غذا خوری، نرم شده
آرد ۱/۲ ۱ پیمانه
بیکینگ پودر ۱/۲ ۱ قاشق مربا خوری
نمک ۱/۲ قاشق مربا خوری
شکر ۱ پیمانه به اضافه ۲ قاشق غذاخوری
تخم مرغ ۱ عدد
شیر ۱/۲ پیمانه
وانیل ۱ قاشق مربا خوری
توت فرنگی ۵۰۰ گرم، برگ ها را گرفته و از نصف کنید
طرز تهیه
۱. فر را روی درجه ۳۵۰ فارنهایت یا ۱۸۰ سانتیگراد روشن کنید تا گرم شود. ظرف پای تا هر ظرف گرد عمیق به قطر ۲۵ سانتیمتری را چرب کنید و آرد بپاشید. در یک کاسه کوچک آرد را با بیکینگ پودر و نمک مخلوط کنید.
۲. یک پیمانه شکر را با کره نرم شده برای ۳ دقیقه با سرعت متوسط تا سریع مخلوط کنید. سرعت همزن را کم کنید و تخم مرغ، شیر و وانیل را اضافه کنید.
۳. مخلوط آرد را اضافه کنید و با سرعت کم انقدر هم بزنید تا مواد مخلوط شوند. مایه را در قالب بریزید و توت فرنگی های نصفه را از طرف نصف شده روی کیک نزدیک به هم بچینید. دو قاشق باقی مانده شکر را روی توت فرنگی ها بپاشید.
۴. کیک را به مدت ۱۰ دقیقه بپزید. سپس حرارت را روی ۳۲۵ فارنهایت یا ۱۶۲ سانتیگراد بیاورید و برای ۱ ساعت دیگر نیز بپزید. تا روی کیک طلایی شود. روی کیک ممکن است مرطوب باشد ولی نگران نباشید تا کیک خنک شود رطوبت کیک هم کم میشود. این کیک را بهتر است داغ سرو نکنید و بگذارد کمی خنک شود و به دمای اتاق برسد. کیک در دمای اتاق به مدت ۲ روز خوب میماند. (البته اگر تا اون موقع دوام بیاره )
Subscribe to:
Posts (Atom)